TrueNAS Scale – How to install, useful links and guides

App Repositories

Before installing TrueNAS I had a look at some guides and kept reading suggestions to install X app from TrueCharts, unsure what that was I put it to the side, but it’s just an app repository and sometimes you may find your desired app is not on the official repository, but on TrueCharts – great.

I personally like to use the official repo and if I can’t find an app on there or it’s not working correctly I use the available one on TrueCharts. Here’s a guide on how to add it, but it’s pretty self explanatory.

Getting Started with TrueCharts | TrueCharts Charts
https://truecharts.org/platforms/scale/guides/getting-started/

TrueNAS Scale: Adding TrueCharts Apps Catalog – Tech Addressed
https://www.techaddressed.com/tutorials/truenas-scale-adding-truecharts/

Resetting Windows Vista Password (and possibly other versions)

To simply put, the main objective is to be able to access the command prompt. The ability to do this is most simply renaming cmd.exe in Windows/System32 folder to a file that is able to be launched on the login screen.

Utilman.exe is the most common one for Windows Vista. You can either use a Live CD, such as Hiren’s BootCD or a Windows 7 installation USB, using the repair option access either Command Prompt or a file explorer (via driver options) to then do the rename process, located in Windows/System32 folder.

Utilman is the bottom left corner icon that would display the accessibility options on the login screen. Renaming cmd.exe to Utilman.exe basically means when you go to turn on this option, the command prompt opens instead.

Steps

Step 1 (to list all users): Net User
Step 2 (to trigger password change): Net User <username> *

Download | Hiren’s BootCD PE
https://www.hirensbootcd.org/download/

How to reset password on Windows 7/ Vista / XP – YouTube
https://www.youtube.com/watch?v=dBf2iqmx5ns

A last resort would be to access the drive via another system and rename the files that way.

Net user | Microsoft Learn
https://learn.microsoft.com/en-us/previous-versions/windows/it-pro/windows-server-2012-r2-and-2012/cc771865(v=ws.11)

Net User Command (Examples, Options, Switches, & More)
https://www.lifewire.com/net-user-command-2618097

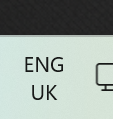
Windows 11: Hiding the annoying “ENG xx” language button on the taskbar

Step 1 – Settings

Open Windows system settings, either going to the start menu and typing “settings” which should be the first option on your search results, or pressing Windows key + I keyboard shortcut.

Step 2 – Settings > Time & Language

On the left, go to ‘Time & Language‘. If you don’t, maybe this instruction is out of date. You could try searching for the next steps as the location may have been changed.

Step 3 – Settings > Time & Language > Typing

Within Time & Language, go to Typing on the list.

Step 4 – Settings > Time & Language > Typing > Advanced keyboard settings

Within Typing, on the list go to Advanced keyboard settings

Step 5 – Settings > Time & Language > Typing > Advanced keyboard settings

Within Advanced keyboard settings, tick the box ‘Use the desktop language bar when it is available‘.

In addition, click on the Language bar options, and make sure the language bar is hidden.

Doing the above should have instantly removed the button the moment you toggled it. If not I would recommend a normal restart and trying these settings again.

Mini Smart Switch with a DIY box or a simple UK Plug to switch box

If a smart power plug is currently overpriced, using a Mini Smart Switch can be an alternative method, especially if it’s going to be a permanent change. However without any case or box it’s a safety risk. Adding a DIY simple plug power box and a socket might make sense, if you’ve got them spare. Essentially making it an extension lead.

Links & References

Simple Plug in Light and Switch – YouTube
https://www.youtube.com/watch?v=ZXaCaA4CEAw

Electrical Wiring Colours – A Complete Guide | RS
https://uk.rs-online.com/web/content/discovery/ideas-and-advice/wiring-colours-guide

Wiring a Mini Smart Switch to control a UK one way lighting circuit

In my case I have one light switch that controls one light bulb. There is 3 bus bars, one 2-slot and the other two 3-slots. The current wiring would basically be like this:

Disclaimer: I am not a qualified electrician. I’m self-taught and this is actually only for my own notes.

Remember, turn off the power anytime you are touching the wiring, I also recommend telling people in the accommodation that you’ll be turning off the power and not to turn it on without informing you.

Power

Live IN (commonly brown wire) to a bus bar (lets label this live bus bar)
Neutral IN (commonly blue wire) to a bus bar (lets label this neutral bus bar)
Ground/Earth (commonly green and yellow striped wire IN to the ground/earth bus bar.

(this is passing the live, neutral & ground to the next room)
Live OUT (commonly brown wire) to the live bus bar
Neutral OUT (commonly blue wire) to the neutral bus bar
Ground/Earth (commonly green and yellow striped wire IN to the ground/earth bus bar.

This means we have 1 slot left on both the live & neutral bus bars

Light Switch

One end connecting to the 2-slot bus bar and the other end connecting to the live bus bar.

Light Bulb

Live (commonly brown wire) (positive end of the light bulb) connects to the 2-slot bus bar (switch).
Neutral (commonly blue wire) (negative end of the light bulb) connects to the neutral bus bar.

Now we should have filled all slots on the 2-slot and both 3-slot bus bars. We’ve basically connected power to the live and neutral bus bars (and the ground/earth connected too).

If unsure which cables are Live and neutral in/out, you should disconnect them and using a multi-metre (set to AC) probe a set of brown and blue wires till you get the 240v, this would be your IN. You can also switch on the light switch and you’ll tell which lines are your switch wires.

Links & References

Wiring Diagram For a One Way Lighting Circuit Using the 3 Plate Method – Connections Explained – YouTube
https://www.youtube.com/watch?v=fixa_1jp55c

Electrical Wiring Colours – A Complete Guide | RS
https://uk.rs-online.com/web/content/discovery/ideas-and-advice/wiring-colours-guide

Installing Android Debug Bridge (adb)

Two ways of installing ADB, the first method is installing via Android Studio which will come with packages you may not ever use. The second option would be to just download the platform-tools

Android Debug Bridge (adb)  |  Android Studio  |  Android Developers
https://developer.android.com/tools/adb

Download Android Studio & App Tools – Android Developers
https://developer.android.com/studio

The second option

SDK Platform Tools release notes  |  Android Studio  |  Android Developers
https://developer.android.com/tools/releases/platform-tools

After installing, extract to somewhere simple, I would recommend C:\ just to avoid any url issues. So it would like like C:\platform-tools, then ensure you’ve set up the system PATH in your environment variables settings as “C:\platform-tools\” it’s as simple as that. Just start a powershell or cmd and type adb to confirm it works.

Other useful guides

How to install ADB on Windows, macOS, and Linux
https://www.xda-developers.com/install-adb-windows-macos-linux/

Commands & Steps

  1. Enable debugging mode on device, then connect device.
  2. Start PowerShell or Command Prompt (CMD)
  3. Type command to see connected devices list:
adb devices
  1. Then type to connect, check the to confirm authorisation:
adb shell

Testing malicious USB Cables

There are currently two ways of testing malicious cables. Pre-made testers and standard USB Testers that you can observe the current draw.

If you don’t know what I mean, check out the O.MG Cable, I will not go into the details of how you can visually tell them apart from other cables, and it depends on the cable brands and I guess both methods are evolving fast.

If you’re serious about making sure it’s malicious, I would recommend getting both or one that includes a current meter. If you’re like me and just want to double check a cable, a USB tester that shows current is enough.

Testers:

How to Detect Malicious USB Spy Cables #TSCM #MurrayAssociatesTSCM – YouTube
https://www.youtube.com/watch?v=nKnZd_1OdsE

O.MG Malicious Cable Detector – Lab401
https://lab401.com/products/o-mg-malicious-cable-detector

The CuVoodoo USB Bug Detector Safely Ferrets Out Those Sneaky Malicious O.MG Cables – Hackster.io
https://www.hackster.io/news/the-cuvoodoo-usb-bug-detector-safely-ferrets-out-those-sneaky-malicious-o-mg-cables-b7f5d961cb5f

USB Testers

FNIRSI-FNB58 Multi-function USB Voltage/Current Meter Type-C Fast Charge Tester

Visually:

How to spot the difference between the O.MG Cable and a standard USB-A Cable – iFixit Repair Guide
https://www.ifixit.com/Guide/How+to+spot+the+difference+between+the+O.MG+Cable+and+a+standard+USB-A+Cable/155496

Other

USB Data Blocker Teardown
https://mg.lol/blog/data-blocker-teardown/

Testing USB Cables – Type C – for Faults

Now days Type C cables require a bit more effort than previously with standard USB A and Macro cables, in addition the pins are so small it’s quite a struggle. To simplify and also check correct negotiations, you should grab a tester.

Test a USB-C Cable for Faults – YouTube
https://www.youtube.com/watch?v=2fIOK8FH3aU

USB-C Cable Testers

Search for:

Treedix USB Cable Tester
….

Mini USB Cable Tester 6 in 1 Cable Diagnostic Tool

Alternatively:

USB-C cable tester – C2C caberQU
https://caberqu.com/home/20-42-c2c-caberqu-746052578813.html#/26-case-without_case

USB-A to USB-C cable tester – A2C caberQU
https://caberqu.com/home/29-40-a2c-caberqu-746052578820.html#/26-case-without_case

FNIRSI-FNB58